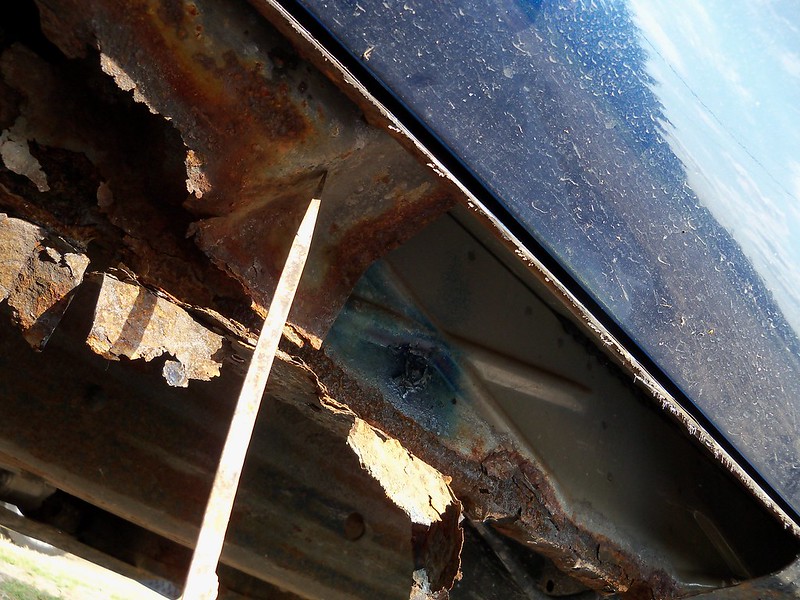
For a 17 year old truck here in the "rust belt" it has held up very well. The one issue is that the rocker panels are rusting out, which happens to most of these trucks if they live in an area where road salt is used during the winter.

Here is the rocker panel rust. Over the last year or so I've sprayed some touch-up paint on them. They rust from the inside out, so the paint doesn't help any, but made it look a little better. It got to the point that I had to do something about it. Some people spray oil inside to slow the rust. I never did since I think it would have made a mess inside and made fixing it later on more work. If there currently isn't any rust, oil to prevent it might be a decent option. The worst "repair" method I've heard of is filling them with expanding foam, and putting bondo over the foam. This would create a royal mess inside if you ever want to fix it. Ultimately they have to come off and all the rust removed. I'll show how I did mine. Keep in mind that there are many ways to do it, and different people might prefer different methods, and this is just one way. Also if you are planning to do yours, it goes without saying to be safe. There are many hazards, from fire to eye injury to chemicals, so don't do anything without understanding these hazards and how to minimize them.

This isn't a project truck, but is my daily driver, so whatever I start on a Friday evening, the truck has to be ready to drive to work on Monday morning. After looking at the different options I decided to go with slip-on style rocker panels. A slip-on is just a partial panel, while a full rocker panel replaces the complete panel all the way to the factory body seams. A full rocker panel is a better repair, but is much more involved, requiring the doors and fenders to be removed, and also part of the interior. Slip-on rockers are also quite a bit less expensive than a full rocker. My rockers weren't completely rotted out, and the rust was limited to areas the slip-ons would cover, so really not necessary to do a full rocker. For me on this truck, all things considered, I think the slip-ons are the way to go.

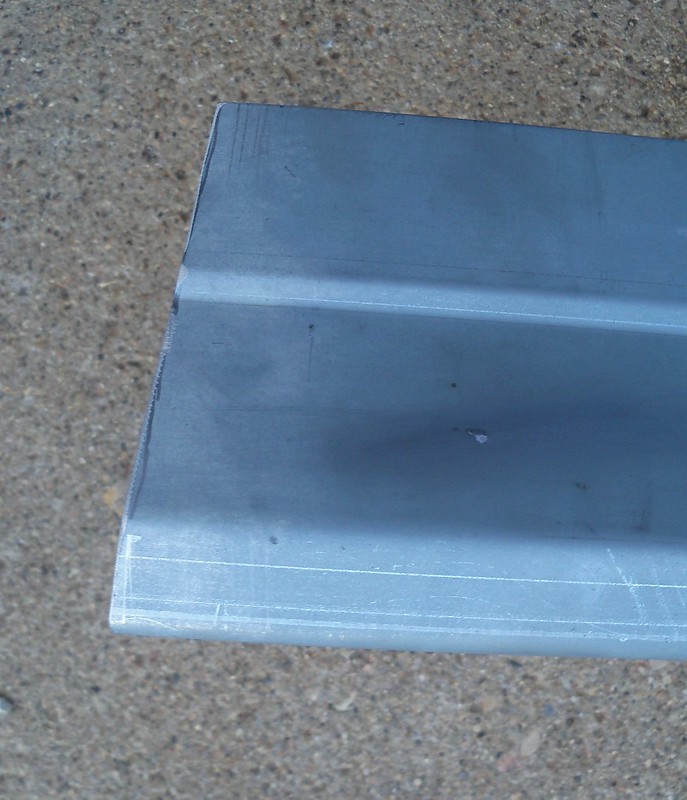
I got these from ebay seller Motor City Sheet Metal for just under $60 with free shipping. They are for an extended cab, so I'll be able to use the extra sections for any repairs needed to the inner rockers.

They are stamped out very nicely, and I was really happy with them, especially considering the low price.

For paint I'm using Dupli-Color self etching primer, VHT roll bar & chassis black, Dupli-Color BGM0506 Indigo Met, and Spray Max 2K clear coat. I used three cans of the primer, two of the chassis black, two of the color coat, and one of the clear. Some other materials used but not pictured include a tube of seam sealer and denatured alcohol for paint prep. Just a personal preference, I won't be using any undercoating. It doesn't bond as well as paint, and can actually crack and lift in spots trapping moisture and dirt and causing rust issues over time.

For most of the metal cutting and shaping I'm using an angle grinder with cut-off wheels and flapper discs.

I have a Mig welder, and I'm experienced with sheet metal welding, but I opted to go with pop rivets. The reason for this is that it allows for maximum rust prevention. To weld you have to leave areas bare metal, and it also can burn the paint from nearby areas. These areas are mostly on the inside of the rocker where there won't be access once the panel is on. There are weld through primers, and also paints that have a hose to reach inaccessible areas, but using rivets allows the inside of seams to be better protected. Using an aluminum rivet with steel can cause corrosion issues, so you want to use steel rivets. I used stainless steel pop rivets. Stainless rivets take more force to use, and can break a cheap rivet gun, so you want to use one made for stainless. The Stanley rivet gun I'm using is made for stainless rivets, and is only about $20. Some worry that rivets can work themselves loose from body flex, but I don't see that as being an issue with a short regular cab. On an extended cab, a body panel adhesive used with the rivets might be a good idea.

Time to get started. The first thing I'm doing is removing the weatherstrip on the bottoms of the doors. Their purpose is to keep the top side of the rocker and the lower door jamb area cleaner. They also can speed up rusting at the door bottom, which is another rust prone area on these trucks, and since the slip-on rocker will sit higher where it contacts them, can wear the paint. After removing the weatherstrip I spot blasted and painted the door bottoms. I'll be leaving them off, but if you want to put them back on later on you just use 3M double sided tape.

The cut is marked out with blue painters tape. I'm also using a rubber work mat since I'm doing this work in gravel, and can't just sweep up the mess when done like on a concrete floor.

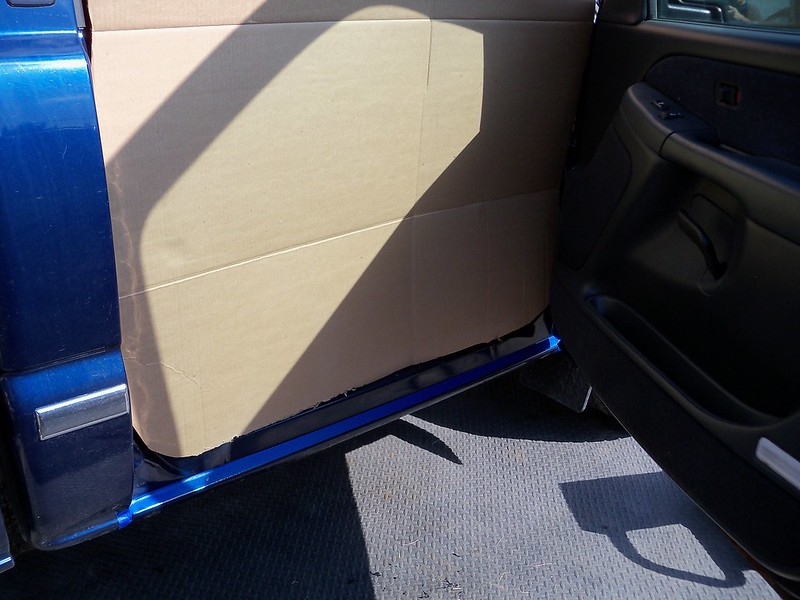
I also cut out a large piece of cardboard to fit snugly with the door jamb. This will protect the interior while working.

On the bottom edge I drilled out the spot welds. You call feel them on the back side, and on the front rub it with sandpaper to make them more visible. On many of them the drill bit just pushed right through the metal, so I knew the inner rocker had some bad rust also.

I started the cut on the top of the rocker.

The rockers stick out farther toward the front, so it was easier to close the door to finish the cut.

Here is the finished cut.

I then made some vertical cuts to remove the rocker in sections, rather than in one piece.

I used a large flat blade screwdriver to pry the outer and inner panels apart as gently as possible.

There is a third panel (which I'm pointing out with the screw driver) between the inner and outer rocker at the rear of the rocker which I then cut out.

Here is more of the panel being removed, using a twisting motion of the screwdriver to separate the two panels.

The front of the inner rocker was very solid, so by being careful I was able to save much of it.

Here the panel is off. This is a good time to use the flapper disc to clean up and deburr the cut line.

I used a cut-off wheel to remove some of the badly rusted parts of the inner rocker. You can see where the rust was starting to get up into the door jamb area, which would have made a full rocker panel necessary if I'd waited any longer.

Here is the rusted panel off the truck. Since I'm doing this in a gravel driveway, using a work mat made cleanup easy.

Now I'm getting ready to sand blast to remove all the surface rust. This requires both being very careful with the blaster, and taking great care to protect the truck.

Getting rid of all of the rust is the most important step, and the most time consuming. The cab corners weren't rusted, but I'll be blasting and painting them also, since it'll be less visible to have the paint line at the body line, rather than a vertical line where the cab corner and rocker meet.

Here it is most of the way done. I got into the front area, and the cab corner in the rear as much as possible. Once the blasting is done I used both compressed air and a shop vac to remove the sand, and then painted it with the self-etching primer. With the paint you want to get into every nook and cranny. The disassembly and rust removal is by far the hardest and most tedious part of this job. Once you've got this done the rest is fun and easy and goes quickly.

I cut the new outer rocker to length so I could use the unused section to repair the inner rocker.

First the part that fits over the top of the rocker is cut off.

Next I need to put more of a bend in the piece. I have a 30" sheet metal brake, but this part was a few inches too long to fit, so I just clamped some old boards together to use as a brake.

I then used a hammer to get the angle of the bend needed.

Then the part was trimmed for the height needed.

This is how the piece will fit on the inner rocker, but first needed cut to fit around the X shaped stiffening stampings on the inner rocker.

I used a Sharpie and a straight edge to mark where material needed to be removed.

Here is the part being test fitted and almost done. I used a large drill bit to drill out the ends of the cuts, then a cut-off wheel for the straight cuts, and finally a die grinder for final fitting.

Here is the piece ready to go. I also drilled the holes for the rivets. This part was then sanded and cleaned up with denatured alcohol prior to being painted with the self-etching primer.

Before attaching the repair piece the facing sides where both painted with the VHT chassis black. The holes are drilled and then riveted one at a time. I used a small modelers brush to paint the holes in the inner rocker after drilling, and dipped the ends of the rivets in paint for maximum rust protection.

I then used seam sealer on the seams of the repair piece, and painted the entire inside with the VHT chassis black.

The outer rocker needed much less time to prepare than the inner rocker repair piece. The front needed cut to match the angle at the front fender.

The rear needed shaped slightly to fit the contour of the door jamb, and was then drilled for the rivets.

For maximum paint adhesion I sand blasted the outer rocker. This lets the paint get a mechanical bite into the metal.

After a wipe down with denatured alcohol the outer rocker was painted with self-etching primer on both sides.

The inside got three coats of the VHT chassis black.

I then drilled and riveted the top one at a time, like the inner dabbing paint in the hole and dipping the tip of the rivet in paint.

I then did the same on the bottom, using vice grips to hold the seam tight. You don't want the rivets to have to pull the parts together.

Seam sealer was then applied where the rocker and cab corner meet.

Then the entire area was painted with more self-etching primer. Once dry it was sanded with 400 grit paper, being careful not to sand through anywhere.

It then got three coats of the Dupli-Color color coat.

The paint went on very nicely.

Here it after clear coating with Spray Max 2K. The Spray Max 2K is a catalyzed paint and much more durable and chemical resistant than paints that dry by solvent evaporation. Acrylic lacquer paints like the Dupli-Color I used can be tricky to top coat, so I allowed plenty of dry time to make sure all of the solvents were evaporated. If not they can be trapped and cause interaction problems after clear coating. Dupli-Color does make a clear to be applied right after the color coat, but I thought the extra durability of the 2K made it worth using. I did one rocker replacement one weekend, the other the next weekend, and then waited two weeks to clear coat both sides. Once the catalyzed Spray Max 2K can is activated you have to use it within a short time period, which is why I cleared them both at the same time. I also wet sanded the color coat with 800 grit, both to remove some of the orange peel, but also since that process opens up the top of the paint to help it dry completely. Before clear coating it is fine to drive the truck, even in the rain. You just want to avoid gravel roads and things like that which could chip the paint.

You have to look very closely to see the paint line. Buffing would reduce it even farther, but I'm fine with it as it is.

No more rust holes!

Some people wouldn't like the visible rivets from the method I used. I think they like fine. If you didn't know better, they look like they are supposed to be there.

The Dupli-Color BGM0506 matched better than you could hope for an auto parts store spray paint. I'm super happy with how it looks.

Of course the rivets aren't visible with the door closed. Only a sharp eye could tell anything was ever done.

All done and the truck looks great. Before, when walking up to the truck the rusted rockers really bugged me. Now I just see a really nice older truck.

Total cost was well under $200 counting everything used, which I think was a good deal. I'd guess my labor at about 8 hours per side, so could have done both sides the same weekend, but I think it made it more fun and less hectic to do them on separate weekends. A lot of that was dry time of paints, and I wasn't in any hurry, so it could be done faster. Anyway, it was a fun project, and hopefully will keep my daily driver looking good for years to come.
